Cookie Compliance
in 15 Minutes
15-Minute Setup Time
100% GDPR Ready
Free Forever Plan
No Credit Card Required

Expert Implementation,
Zero Hassle
- Complete GTM & CookieHub Setup
Professional configuration and integration. - Full Testing & Verification
We ensure perfect compliance across all devices. - 30 Days Post-Implementation Support
Ongoing support and peace of mind after launch.
The Complete Guide
STEP 1
Choose a Consent Management Platform
A solid consent management platform (CMP) is essential for your website cookie policy. We've researched and tested many, and for this guide, we recommend CookieHub. It's a robust, Google Certified CMP with a great free plan.
-
Free lifetime plan available
-
No credit card required to sign up
-
Google Certified and GDPR compliant
STEP 2
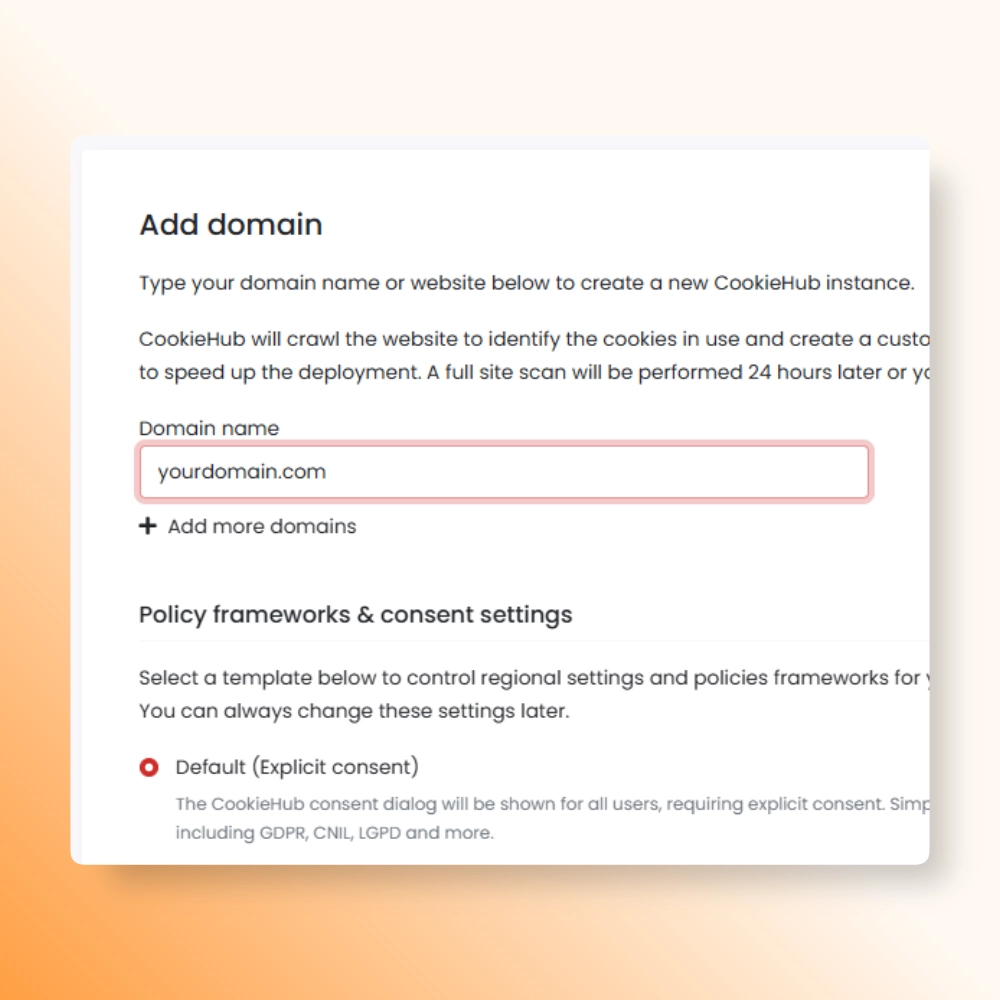
Add Your Domain
Once your CookieHub account is created, you need to add your website domain.
- In your CookieHub account, go to Domains and click Add domain.
- Enter your domain name (e.g., yourwebsite.com).
- Choose the relevant policy framework (the default is usually fine to start).
- Select a plan. The Free plan covers up to 5,000 monthly sessions.
- For more features, paid plans are available.
-
Use code MTC1MTIY for 10% off all plans
-
Covers GDPR, CCPA, LGPD, and 7 other regulations
-
Available in 39 languages
STEP 3
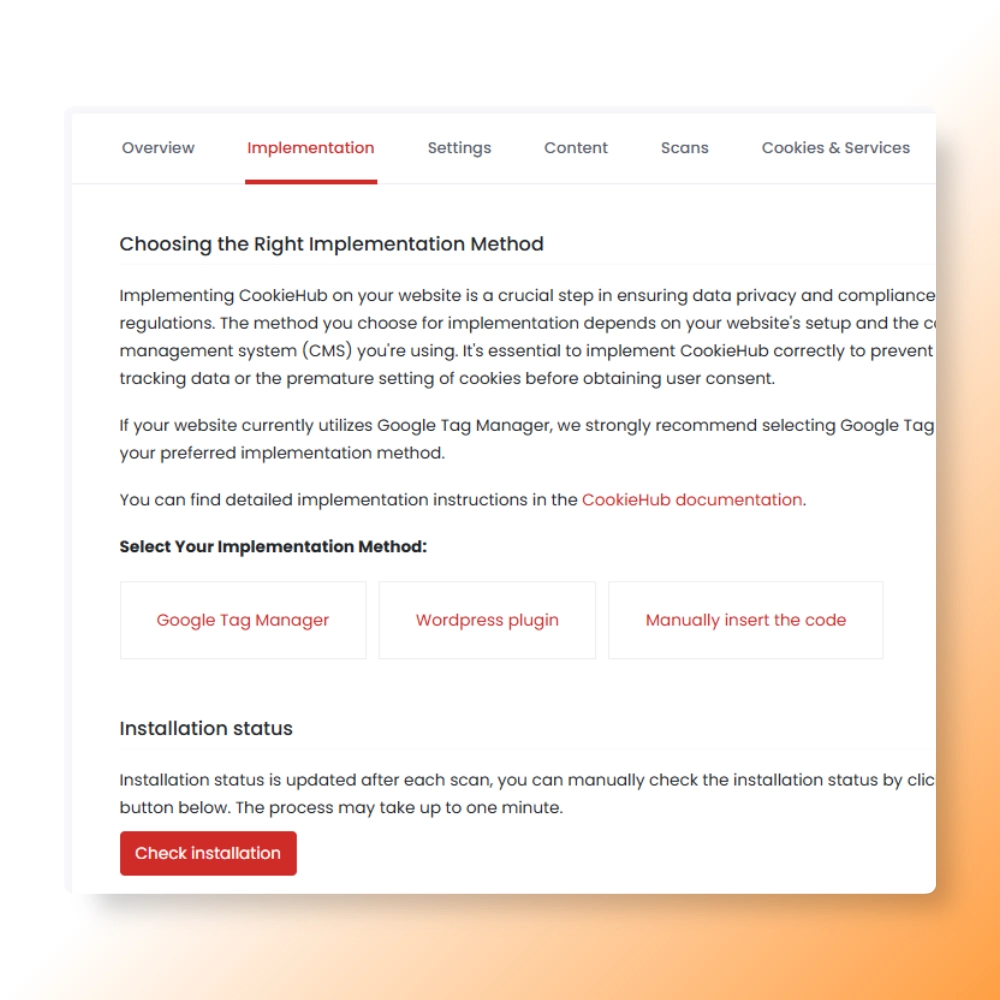
Add the Banner to Your Site
We recommend using Google Tag Manager (GTM) for the cleanest implementation. It keeps all your tracking scripts in one place and works seamlessly with CookieHub.
-
Recommended: Google Tag Manager
The best practice. Add the official CookieHub template to your GTM container. It works perfectly with other tracking tags.
Here’s the simple-to-follow installation guide. -
WordPress Plugin
A simple option if you're not using GTM. Install the plugin directly on your site. -
Manual Code
For other platforms, you can paste a small code snippet into your site's <head>.
STEP 4
Configure Google Analytics
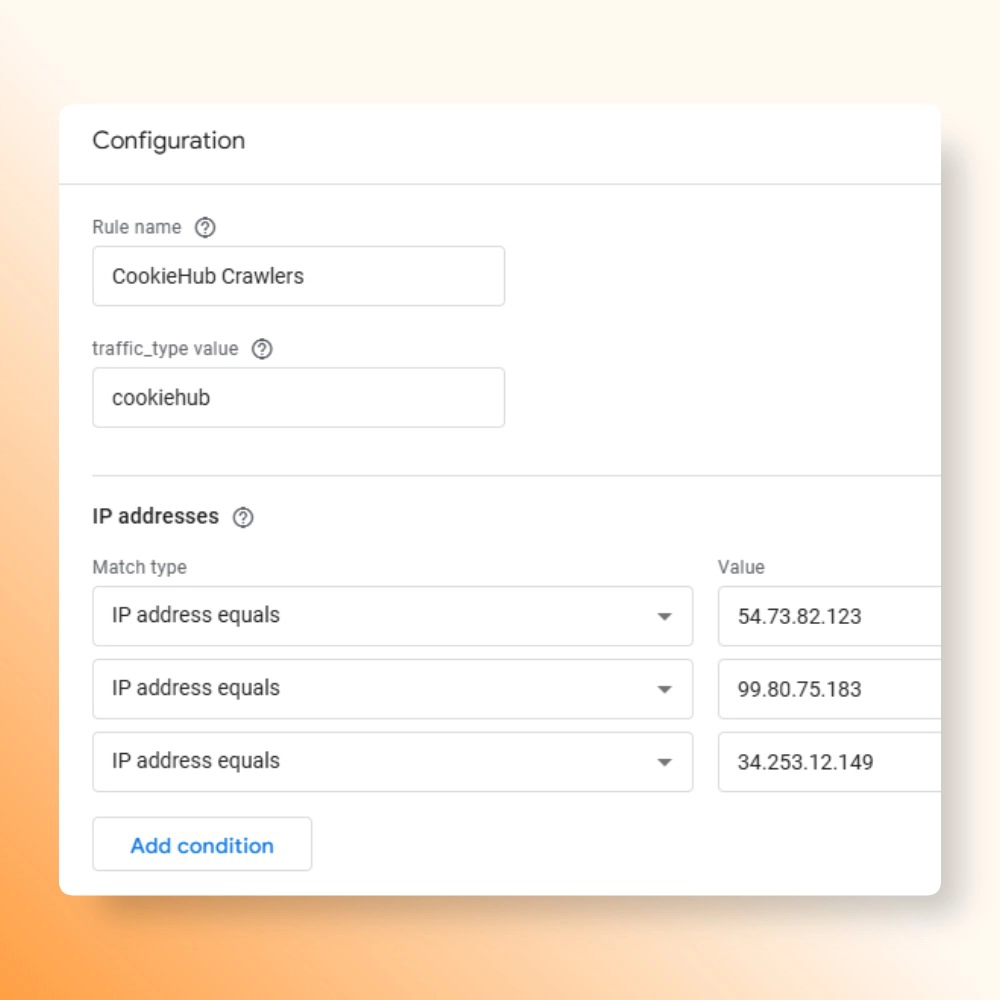
This step ensures the CookieHub scanning bot doesn't inflate your traffic numbers in Google Analytics 4. You need to create a data filter to exclude traffic from their specific IP addresses.
-
Define CookieHub Traffic
In GA4, go to: Admin > Data Streams > Select your web stream > Configure tag settings > Show more > Define internal traffic > Create.
Rule name: CookieHub Crawlers
traffic_type value: cookiehub
Match type: IP address equals
Value: Enter the IPs below, one by one.
-
Exclude Following IPs:
- 54.73.82.123
- 99.80.75.183
- 34.253.12.149
-
Exclude CookieHub Crawlers
In GA4, go to: Admin > Data Filters > Create Filter.
Select template: Internal Traffic
Filter name: CookieHub Crawlers
Filter operation: Exclude
Filter based on traffic_type parameter value: cookiehub
Filter state: Active > Create.
STEP 5
Finalize Your Settings
Almost there! The final steps involve reviewing the settings inside CookieHub to ensure everything is perfect. We've provided our recommended baseline settings below to give you the best starting point.
Billing
If you opt for a paid subscription plan, you will need to provide payment details. You can do this under the Billing tab by linking either your credit card or PayPal.
Below are our recommended baseline settings, located under their respective tabs in your domain details. We encourage you to test these defaults and adjust them to suit your needs.
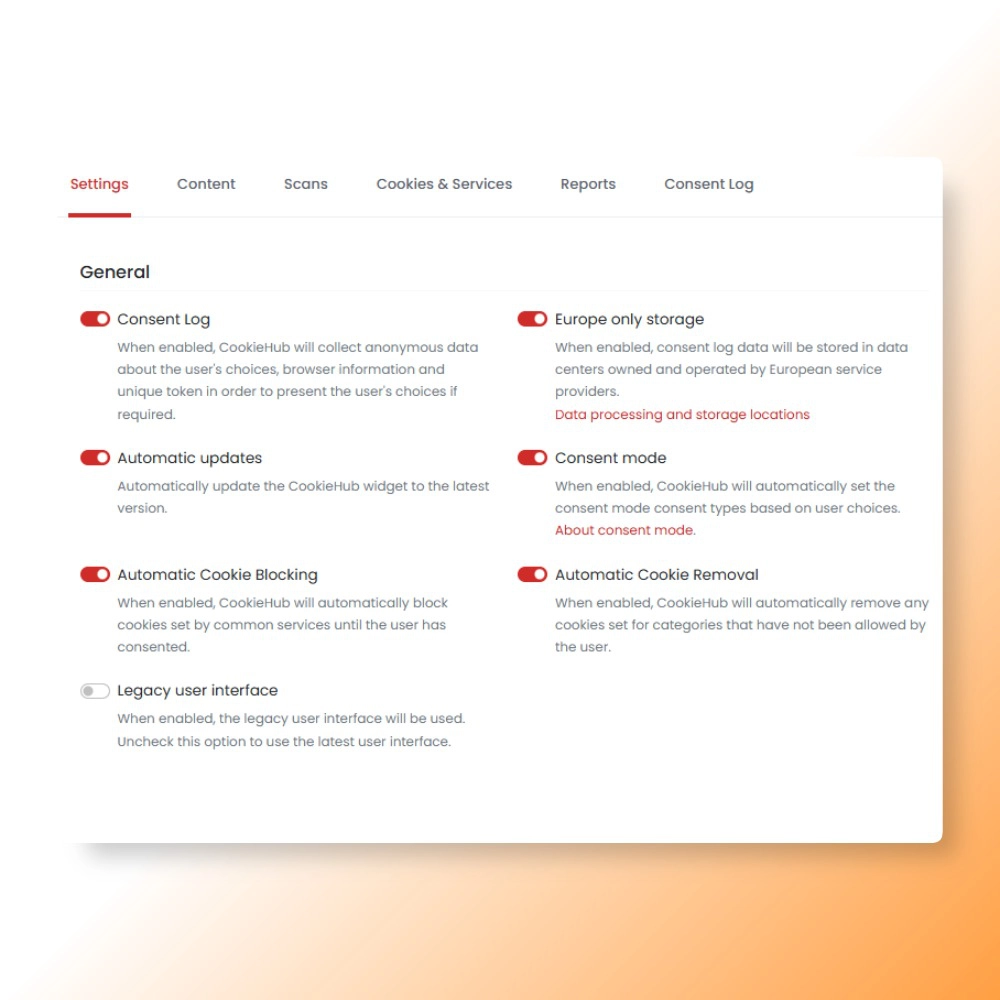
Settings
Consent Log - On
Europe only storage - On (EU companies)
Automatic updates - On
Consent mode - On
Automatic Cookie Blocking - On
Automatic Cookie Removal - On
Legacy user interface - Off
Consent mode settings - Advanced
Regional settings - Default
Default language - Site's main language
Display language - Automatically detect
Additional languages - Secondary languages
Categories - Default
Content
In the Content tab, you can adjust the cookie banner's text (copy) for each language you support.
After the first scan is completed, it's important to manage the discovered cookies. Scroll down within your Content settings to the Cookies section and write clear descriptions for each cookie your site uses.
💡 PRO TIP: To optimize for a higher consent rate, export the consent data using the Reports tab. Create a spreadsheet with this report and A/B test to see which versions of your banner's text achieves better results.
Scans
The Scans tab allows you to manually request a website scan to detect any newly added cookies. Additionally, for users on the Basic or higher plans, CH performs automatic monthly scans.
Automatic Cookie Scans - On
Include LocalStorage & sessionStorage - On
Publish After Successful Scan - On
Reset Consent After Scan - Off
Configure the remaining settings on this tab based on your specific needs and website setup.
Cookies & Services
In the Cookies & Services tab, you can review each detected cookie and assign or adjust its category.
Pay special attention to any cookies marked with a red ❌ symbol. This typically indicates that the cookie is either being set before the user gives consent, or it hasn't yet been assigned to a category.
To resolve this and clear the flag, review these specific cookies and move them into their appropriate categories.
Reports
The Reports tab provides data, including a useful chart, for A/B testing settings like banner copy or design to improve your consent rates.
Consent Rate (CR) is the percentage of users who actively agreed (opted-in) out of the total number of users who were presented with the consent banner.
You can calculate the Consent Rate from the report using this basic formula:
(Allowed Sessions / Total Sessions) * 100
Consent Log
Consent Log serves as a detailed diary, recording exactly when and how a user agreed (or disagreed) to let your website or app use their personal data.
It's an essential proof that your organization is following privacy laws and respecting the user's choices.
It allows you to demonstrate compliance if questioned by authorities and track any updates to a user's permissions over time.
STEP 6
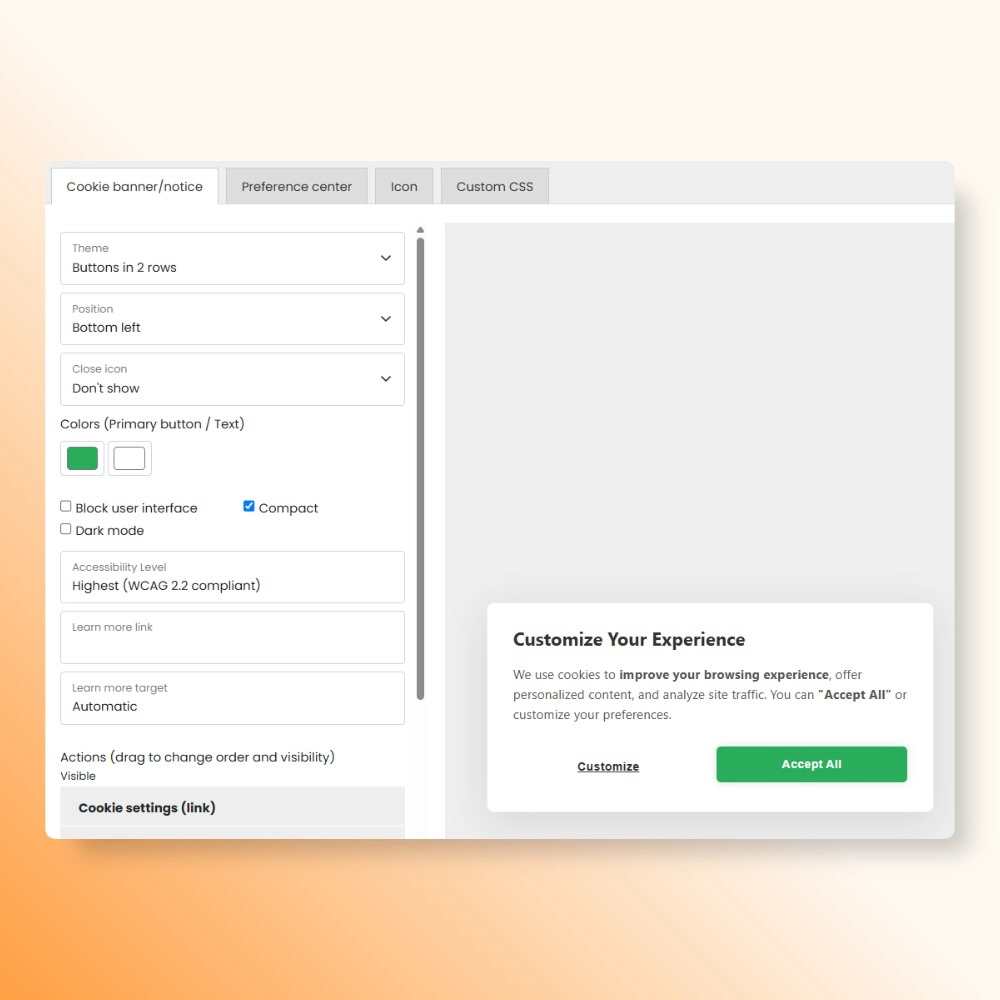
Customize Your Banner
Click the Customize button to adjust the banner's appearance and match it to your website's design.
Based on our data, these settings yield higher consent rates:
Congratulations, you komply!
You've saved and published your changes, and voilà! Your website is now fully compliant. It offers visitors an experience that respects user privacy while meeting regulatory requirements.
If you found this guide helpful, please share it with others who might benefit.